Flutter第3天--基础控件(上)

Flutter七日游第三天:2018-12-18 天气:晴朗

零、前言

浪了两天,Dart语法基本上熟悉了,绘图也不怕了,现在进入正轨,继续浪~
今天来学些枯燥的东西了–基础控件,戒骄戒躁,基础还是要好好掌握。
本文目的在于尽可能看清控件的全局(细枝末节点到为止),详细用法等布局实战再细说吧
本文能用图的,尽量不用字(看完你可能会觉得我脑洞有点大),废话不多说,进入今天的内容


一、Widget简入

Widget:[小器具,装饰品,窗口小部件],以后简称:控件
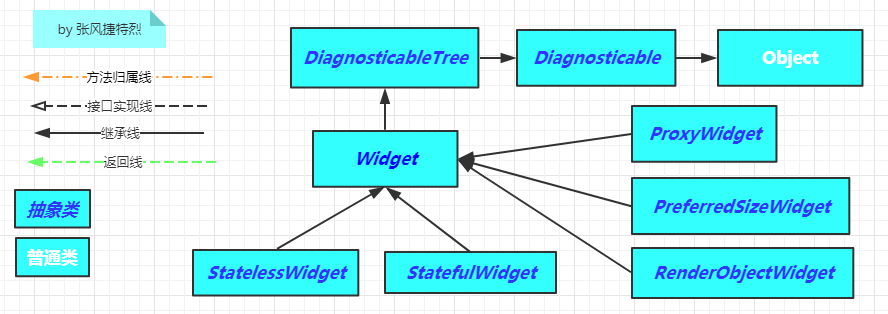
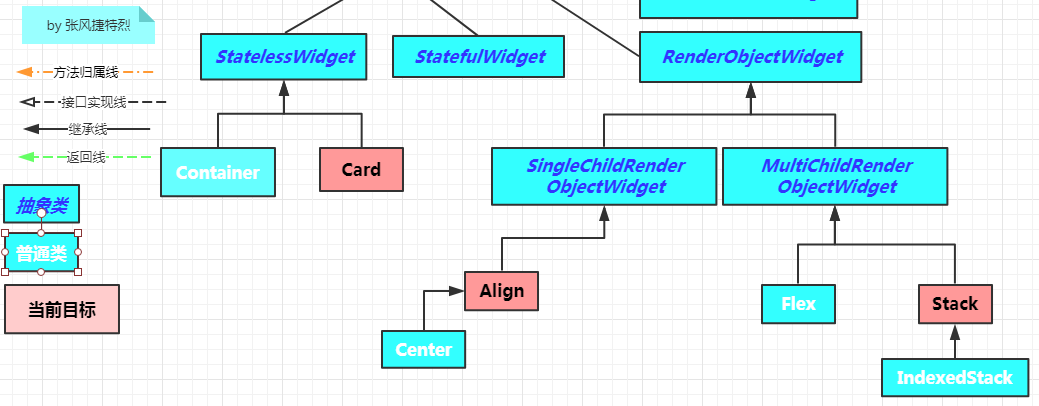
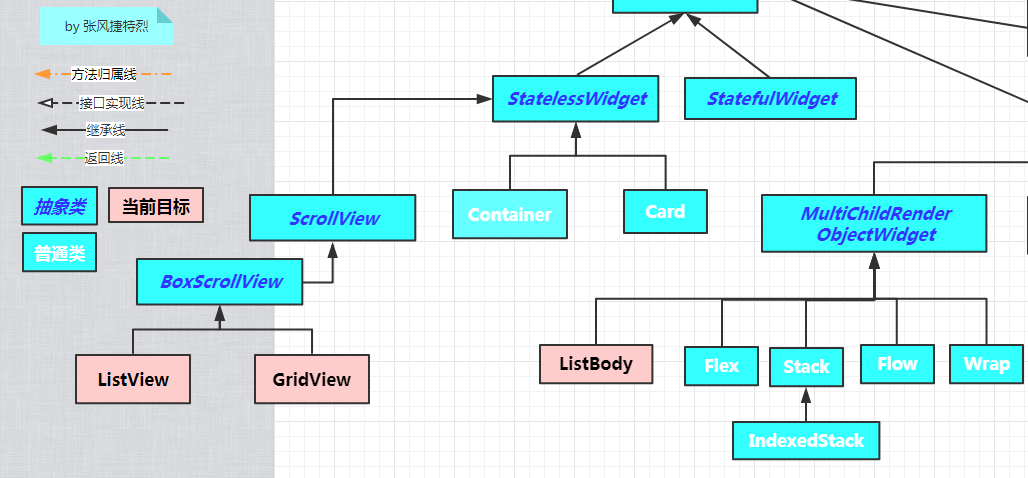
下面看一下Widget树:(只延伸到下代)


1.StatelessWidgetStatefulWidget

目前出现在我眼前的只这有两个,所以先只看这两个:

1
2
3
4
5
6
7
StatelessWidget:源码第一句话:
---->A widget that does not require mutable state.
---->一个不需要变动状态的控件

StatefulWidget :源码第一句话:
---->A widget that has mutable state.
---->一个可变动状态的控件

2.StatelessWidget一共就有三个方法:

1
2
3
4
5
6
7
8
9
10
11
12
13
14
15
16
17
18
19
20
-------->[构造方法,需要一个key,而且老爸已经给他了]----
/// Initializes [key] for subclasses.
const StatelessWidget({ Key key }) : super(key: key);

-------->[createElement方法复写Widget方法,使用StatelessElement--tag1--自给自足]
/// It is uncommon for subclasses to override this method.
//子类重写此方法是不常见的。----所以就不要没事找事了
StatelessElement createElement() => StatelessElement(this);

--tag1-->[StatelessElement,接收一个StatelessWidget]
/// An [Element] that uses a [StatelessWidget] as its configuration.
class StatelessElement extends ComponentElement {
/// Creates an element that uses the given widget as its configuration.
StatelessElement(StatelessWidget widget) : super(widget);

-------->[使用现在要关注的只有:build方法--]
/// Describes the part of the user interface represented by this widget.
//描述此控件呈现在用户界面上的部分
@protected
Widget build(BuildContext context);//空实现

3.初始项目看StatelessWidget:

StatelessWidget映入眼帘,可见该类内部一定有一个build方法返回一个Widget

1
2
3
4
5
6
7
8
9
10
11
12
13
14
15
class MyApp extends StatelessWidget {
@override
Widget build(BuildContext context) {
return MaterialApp(
title: 'Flutter Demo',
theme: ThemeData(
primarySwatch: Colors.lightBlue,
),
home:MyHomePage(title: 'Flutter Demo Home Page'),
);
}
}

//不难看出MaterialApp是一个Widget,而且至少有title,theme,home三个属性
而且home传入的是一个Widget

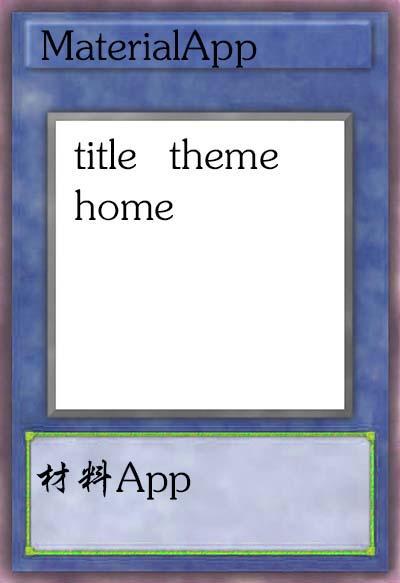
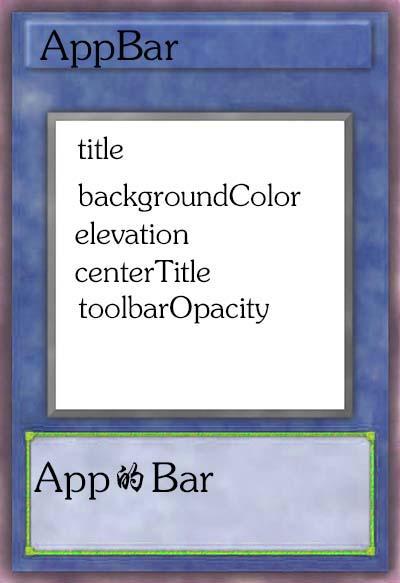
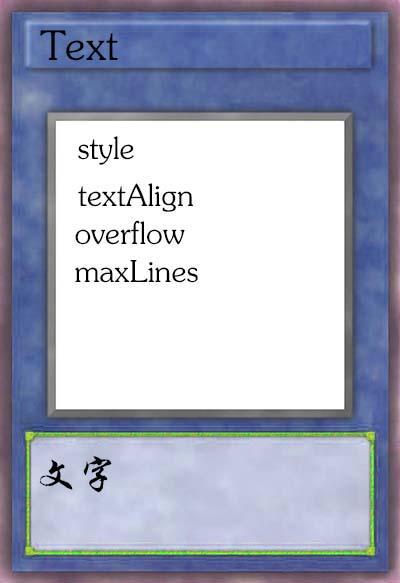
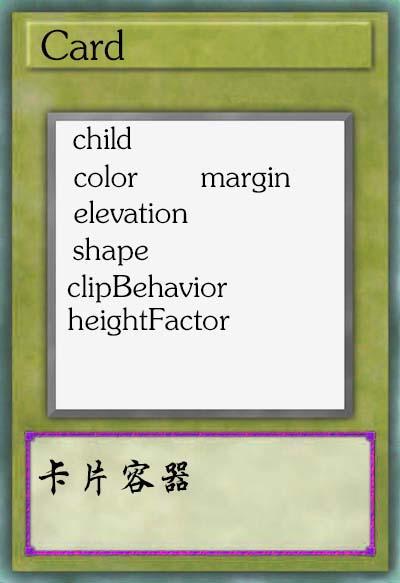
4.恭喜达成成就:Widget源码偷窥者, 成就奖励:三张卡片:

卡片初始属性:见白框(PS:属性会随着你的阅历变多哦)

- - -

二、Flutter卡牌游戏Start

接下来会列出一长串属性,并挑选些简单的属性测试一下
如果你觉得及其无聊,列属性的地方可以跳过,基本上每三个做一个小测试

1:MaterialApp--材料App

An application that uses material design.源码如是说:一个使用材料设计的App
继承自StatefulWidget,字段蛮多的,先列一下,看看现在用到的,其他的用到再说吧。

1
2
3
4
5
6
7
8
9
10
11
12
13
14
15
16
17
18
19
20
21
22
23
24
25
26
27
28
29
30
31
32
33
34
35
36
37
class MaterialApp extends StatefulWidget 

this.navigatorKey,
this.home,//--->tag1<---
this.routes = const <String, WidgetBuilder>{},
this.initialRoute,
this.onGenerateRoute,
this.onUnknownRoute,
this.navigatorObservers = const <NavigatorObserver>[],
this.builder,
this.title = '',//--->tag2<---
this.onGenerateTitle,
this.color,
this.theme,//--->tag3<---
this.locale,
this.localizationsDelegates,
this.localeListResolutionCallback,
this.localeResolutionCallback,
this.supportedLocales = const <Locale>[Locale('en', 'US')],
this.debugShowMaterialGrid = false,
this.showPerformanceOverlay = false,
this.checkerboardRasterCacheImages = false,
this.checkerboardOffscreenLayers = false,
this.showSemanticsDebugger = false,
this.debugShowCheckedModeBanner = true,

//--->tag1<---[title是个字符串]----
/// This value is passed unmodified to [WidgetsApp.title].
final String title;

//--->tag2<---[theme是个ThemeData对象:保存材料设计主题的颜色和版式值]----
/// The colors to use for the application's widgets.
final ThemeData theme;

//--->tag3<---[home是个Widget对象]----
/// {@macro flutter.widgets.widgetsApp.home}
final Widget home;

2.Scaffold--脚手架

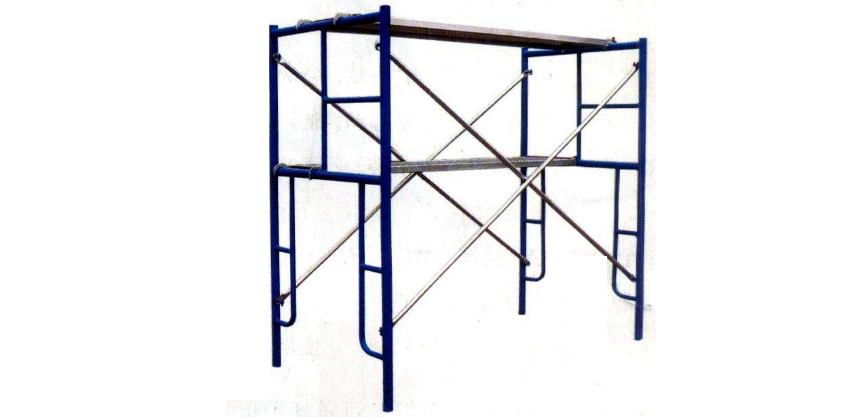
什么是脚手架,大概就是这个感觉吧,也就是辅助脚手的工具,方便施工
1
2
3
4
5
6
7
8
9
10
11
12
13
PreferredSizeWidget             this.appBar,
Widget this.body,
Widget this.floatingActionButton,
FloatingActionButtonLocation this.floatingActionButtonLocation,
FloatingActionButtonAnimator this.floatingActionButtonAnimator,
List<Widget> this.persistentFooterButtons,
Widget this.drawer,
Widget this.endDrawer,
Widget this.bottomNavigationBar,
Widget this.bottomSheet,
Color this.backgroundColor,
bool this.resizeToAvoidBottomPadding = true,
bool this.primary = true,

3:AppBar--App的Bar

就像安卓的ToolBar一样的控件

1
2
3
4
5
6
7
8
9
10
11
12
13
14
15
16
Widget                  this.leading,
bool this.automaticallyImplyLeading = true,
Widget this.title,
List<Widget> this.actions,
Widget this.flexibleSpace,
PreferredSizeWidget this.bottom,
double this.elevation = 4.0,
Color this.backgroundColor,
Brightness this.brightness,
IconThemeData this.iconTheme,
TextTheme this.textTheme,
bool this.primary = true,
bool this.centerTitle,
double this.titleSpacing = NavigationToolbar.kMiddleSpacing,
double this.toolbarOpacity = 1.0,
double this.bottomOpacity = 1.0,

新手任务1:能力小测试

1
2
3
4
5
6
7
8
9
10
11
12
13
MaterialApp(
title: 'Flutter Demo',
theme: ThemeData(
primarySwatch: Colors.lightBlue,
),
home: Scaffold(
appBar: AppBar(
title: Text("张风捷特烈"),//标题
backgroundColor: Color(0xffcbf231), //背景色
elevation: 12,//阴影
centerTitle: true,
toolbarOpacity: .4)//透明度
));
新手任务完成,奖励卡片:欢迎继续冒险
- - -

4:Text--文字
1
2
3
4
5
6
7
8
9
10
11
12
13
14
15
 const Text(this.data, {
TextStyle this.style,
TextAlign this.textAlign,
TextDirection this.textDirection,
Locale this.locale,
bool this.softWrap,
TextOverflow this.overflow,
double this.textScaleFactor,
int this.maxLines,
String this.semanticsLabel,

/// Creates a text widget with a [TextSpan].
const Text.rich(this.textSpan, {
//同上
})
1
2
3
4
5
6
7
8
9
10
11
12
13
14
15
16
17
18
19
20
21
22
23
24
25
26
27
28
29
//---->[TextStyle]----------------
bool this.inherit = true,
Color this.color,
double this.fontSize,
FontWeight this.fontWeight,
FontStyle this.fontStyle,
double this.letterSpacing,
double this.wordSpacing,
TextBaseline this.textBaseline,
double this.height,
Locale this.locale,
Paint this.foreground,
Paint this.background,
List<ui.Shadow> this.shadows,
TextDecoration this.decoration,
Color this.decorationColor,
TextDecorationStyle this.decorationStyle,
String this.debugLabel,
String String fontFamily,

//---->[TextAlign]----------------
enum TextAlign {
left,right,center,justify,start,end,
}

//---->[TextOverflow]----------------
enum TextOverflow {
clip,fade,ellipsis,
}

5.FloatingActionButton--浮动动作按钮
1
2
3
4
5
6
7
8
9
10
11
12
13
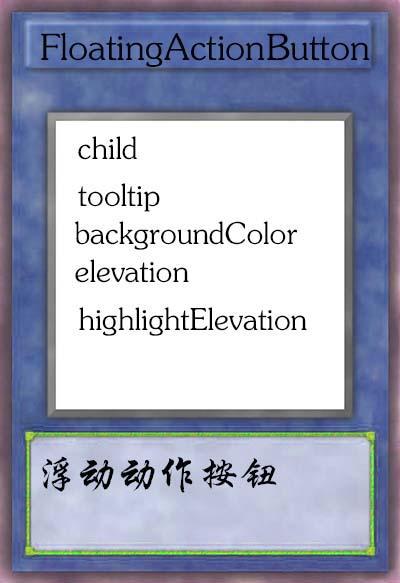
Widget                  this.child,
String this.tooltip,
Color this.foregroundColor,
Color this.backgroundColor,
Object this.heroTag = const _DefaultHeroTag(),
double this.elevation = 6.0,
double this.highlightElevation = 12.0,
VoidCallback @required this.onPressed,
bool this.mini = false,
ShapeBorder this.shape = const CircleBorder(),
Clip this.clipBehavior = Clip.none,
MaterialTapTargetSize this.materialTapTargetSize,
bool this.isExtended = false,
6.Icon--图标
1
2
3
4
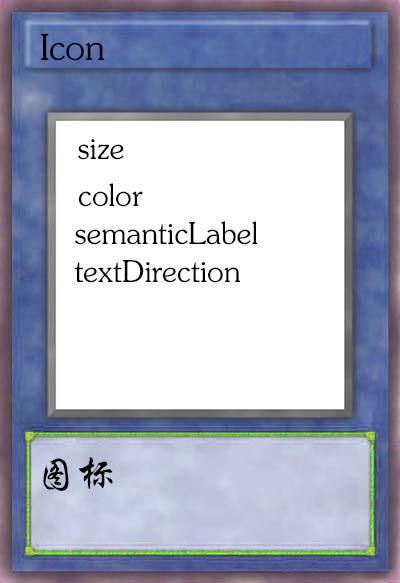
double          this.size,
Color this.color,
String this.semanticLabel,------This label does not show in the UI.
TextDirection this.textDirection,
新手任务2:

1
2
3
4
5
6
7
8
9
10
11
12
13
14
15
16
17
18
19
body: Text(
"一箫一剑平生意,负尽狂名十五年",
maxLines: 1,
overflow: TextOverflow.fade,
style: TextStyle(
color: Colors.blue,
fontSize: 20,
letterSpacing: 10,
fontWeight: FontWeight.bold,
background: Paint()..color = Colors.amberAccent),
),
floatingActionButton: FloatingActionButton(
backgroundColor: Colors.deepOrangeAccent,
elevation: 12,
highlightElevation: 24,
onPressed: () {},
tooltip: 'Increment',
child: Icon(Icons.add,size: 40,color: Colors.white,semanticLabel:"toly"),
),

三、基础控件点将台(1)

以上6张卡片是初始项目中的控件,通过新手任务基本上更加熟悉了一些
Flutter还有哪些控件,建议看一下Flutter中文网,罗列的挺好的,下面一起学习一下
(PS:看了一下,真是多如鸡毛…吓得我不知从何入手)

1
2
所谓`打蛇打七寸,擒贼先擒王`,小兵之后再收拾  
通过Android和html+css,我领悟到,对于界面设计者而言,布局是至关重要的,所以先看容器
1.Layout布局容器之Row+Column--行+列


1.1:Row的基础认知
1
2
3
4
5
6
7
8
9
10
11
12
13
---->[源码注释第一句]-----------------------------
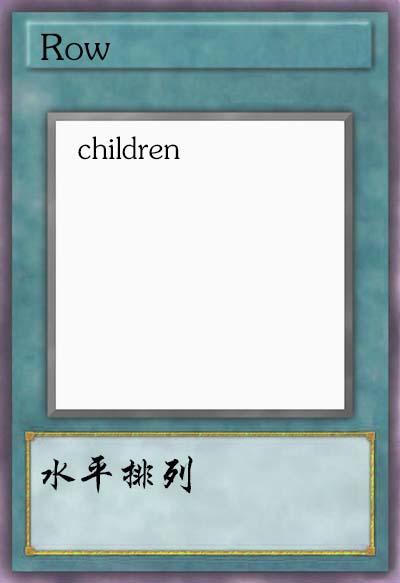
A widget that displays its children in a horizontal array.
一个以水平数组的形式显示其子部件的Widget。

Row({
Key key,
MainAxisAlignment mainAxisAlignment = MainAxisAlignment.start,
MainAxisSize mainAxisSize = MainAxisSize.max,
CrossAxisAlignment crossAxisAlignment = CrossAxisAlignment.center,
TextDirection textDirection,
VerticalDirection verticalDirection = VerticalDirection.down,
TextBaseline textBaseline,
List<Widget> children = const <Widget>[],
1.2:基本使用

children看来是一个Widget数组,想想也不难理解,毕竟做大哥的,当然要有不少小弟啦
注:为了方便修改,以下代码把Scaffold的body属性值抽成变量使用

1
2
3
4
5
6
7
8
var row_test = Row(
children: <Widget>[
Text('绝域从军计惘然,,'),
Text('东南幽恨满词笺。'),
Text('一箫一剑平生意,'),
Text('负尽狂名十五年。'),
],
);

可以看出越界有提醒,感觉蛮有心的,水平排列没毛病


1.3.Column:用法基本上差不多
1
2
3
4
5
6
7
8
9
10
11
12
13
---->[源码注释第一句]-----------------------------
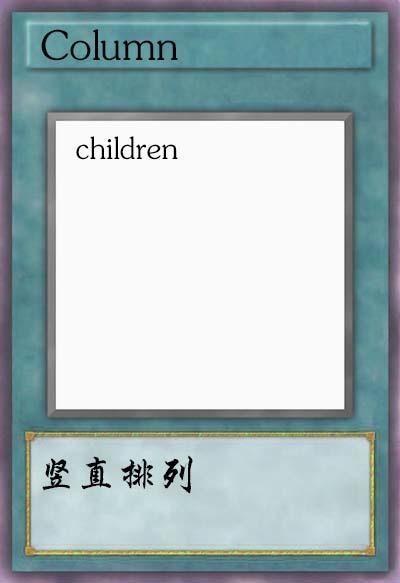
A widget that displays its children in a vertical array.
一个以竖直数组的形式显示其子部件的Widget。

Column({
Key key,
MainAxisAlignment mainAxisAlignment = MainAxisAlignment.start,
MainAxisSize mainAxisSize = MainAxisSize.max,
CrossAxisAlignment crossAxisAlignment = CrossAxisAlignment.center,
TextDirection textDirection,
VerticalDirection verticalDirection = VerticalDirection.down,
TextBaseline textBaseline,
List<Widget> children = const <Widget>[],
1.4.Column基本使用
1
2
3
4
5
6
7
8
var row_column = Column(
children: <Widget>[
Text('绝域从军计惘然,,'),
Text('东南幽恨满词笺。'),
Text('一箫一剑平生意,'),
Text('负尽狂名十五年。'),
],
);


恭喜完成成就:布局菜鸟—奖励卡片:
- - -

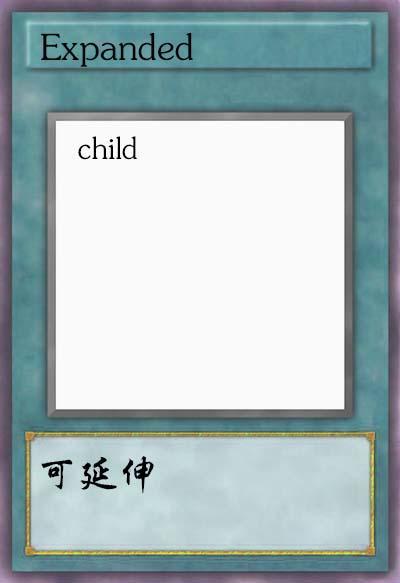
恭喜解锁新卡片:Expanded,快去用用吧
Expanded意思是:使…伸展,看到下面的图,你应该就会明白

1
2
3
4
5
6
7
8
9
10
11
12
13
14
15
16
var row_test = Row(
children: <Widget>[
Expanded(
child:Text('绝域从军计惘然,'),
),
Expanded(
child:Text('东南幽恨满词笺。'),
),
Expanded(
child:Text('一箫一剑平生意,'),
),
Expanded(
child:Text('负尽狂名十五年。'),
),
],
);


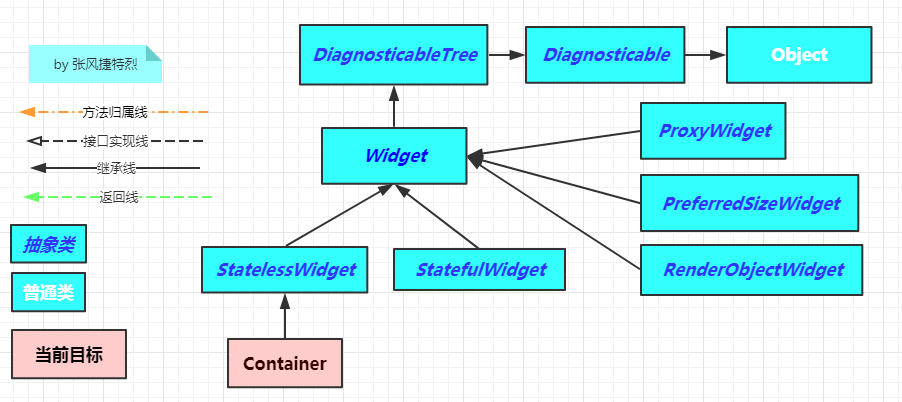
2.Container--容器

可以理解为Android中的View,更像html中的div
Container是一个没有状态的控件

2.1:源码小窥
1
2
3
4
5
6
7
8
9
10
11
12
13
14
15
---->[源码注释第一句]-----------------------------
A convenience widget that combines common painting, positioning, and sizing widgets.
一个方便的widget,它组合了常见的painting、positioning和sizing 控件。

Color color,
double width,
double height,
Widget this.child,
EdgeInsetsGeometry this.margin,
EdgeInsetsGeometry this.padding,
AlignmentGeometry this.alignment,
Decoration Decoration decoration,
Decoration this.foregroundDecoration,
BoxConstraints BoxConstraints constraints,
Matrix4 this.transform,

2.2:简单使用:

[插曲]这里分享一个点:当看到一个新的东西应该怎么办?

1
2
3
4
5
6
7
8
9
10
11
12
比如`margin`,看到`EdgeInsetsGeometry`我的心情是一脸懵X,不应该是数字吗?
进源码:`abstract class EdgeInsetsGeometry {`,抽象的,找他儿子去,
AndroidStudio中按`Ctrl+H`可以查看继承树,然后就看到了EdgeInsets.fromLTRB
这样Flutter的margin就和你的知识库中的margin进行了连接,你就会用了

class EdgeInsets extends EdgeInsetsGeometry {
const EdgeInsets.fromLTRB(this.left, this.top, this.right, this.bottom);
const EdgeInsets.all(double value)
: left = value, top = value, right = value, bottom = value;

新事物往往都与旧事物有联系,学习新事物最好快速找到它与你知识库中旧事物的联系,
联系的多少取决于你知识库中内容的多少,连接得越多,你会越快或越能掌握旧事物
1
2
3
4
5
6
7
8
var container_test = Container(
color: Color.fromARGB(100, 81, 211, 253),
height: 100,
width: 200,
child: Text("张风捷特烈"),
margin: EdgeInsets.fromLTRB(5, 10, 15, 20),
padding: EdgeInsets.all(40),
);

padding和margin简称pm,左图是上面代码没有pm时,右图是有pm时


恭喜达成成就:Container使用者–卡牌奖励:
- - -

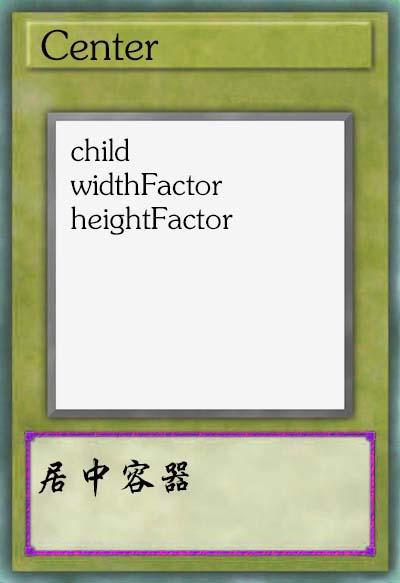
NPC:恭喜解锁两张辅助卡PaddingCenter,快来测试一下吧
这两个没什么好说的,顾图思义,看图吧

1
2
3
4
5
6
7
8
9
10
11
12
13
14
15
16
17
18
19
var padding_test = Container(
color: Color.fromARGB(100, 81, 211, 253),
height: 150,
width: 250,
child: Padding(
padding: EdgeInsets.all(10),
child: Text("张风捷特烈"),
),
);


var center_test = Container(
color: Color.fromARGB(100, 81, 211, 253),
height: 150,
width: 250,
child: Center(
child: Text("张风捷特烈"),
),
);


3.Stack -- 堆叠

第一反应:栈?有道了一下,有堆叠的意思

1
2
3
4
5
6
7
8
9
---->[源码注释第一句]-----------------------------
A widget that positions its children relative to the edges of its box.
一个相对于它的框的边缘来定位它的子部件的Widget。

this.alignment = AlignmentDirectional.topStart,
this.textDirection,
this.fit = StackFit.loose,
this.overflow = Overflow.clip,
List<Widget> children = const <Widget>[],

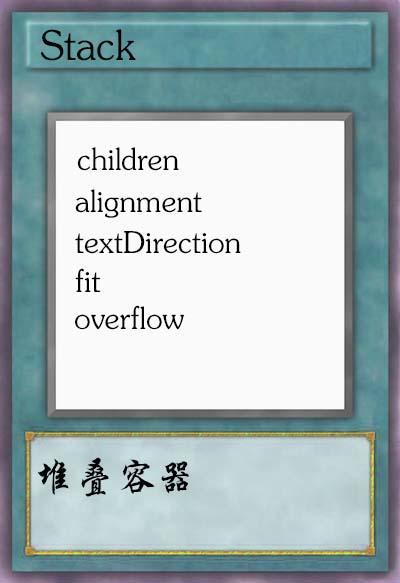
触发新手任务3,并触发局部Widget树,系统赠送卡牌:

- - -

请完成下面布局:

1
2
3
4
5
6
7
8
9
10
11
12
13
14
15
16
17
18
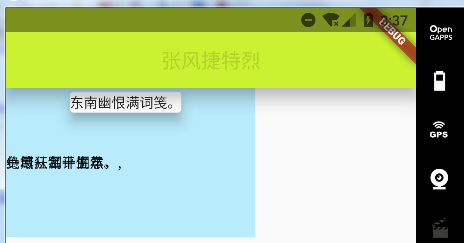
var stack_test = Container(
color: Color.fromARGB(100, 81, 211, 253),
height: 150,
width: 250,
child: Stack(
alignment: Alignment.centerLeft,
children: <Widget>[
Text('绝域从军计惘然,,'),
Align(
alignment: Alignment.topRight,
widthFactor: 1.5,
child: Card(
elevation: 10, color: Color(0xffffffff), child: Text('东南幽恨满词笺。')),
),
Text('一箫一剑平生意,'),
Text('负尽狂名十五年。'),
],
));

现在对Stack有点感觉了吧,它像FramLayout一样会叠合控件,
并且alignment还可以确定Stack自身相对于老爸的位置
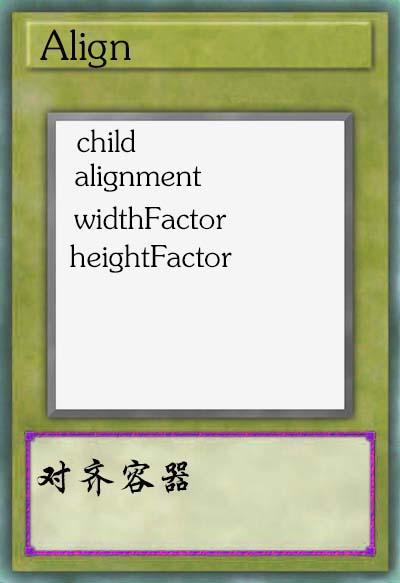
Align也有alignment,不过能有一个孩子,Card我最喜欢了
这里mark一下Card里的ShapeBorder shape,源码粗略看了一下,可能挺好玩,今天主看控件


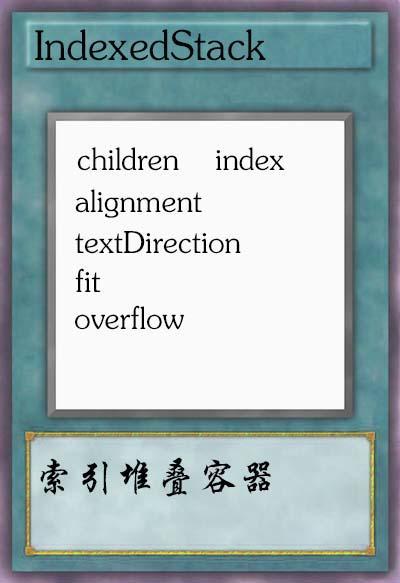
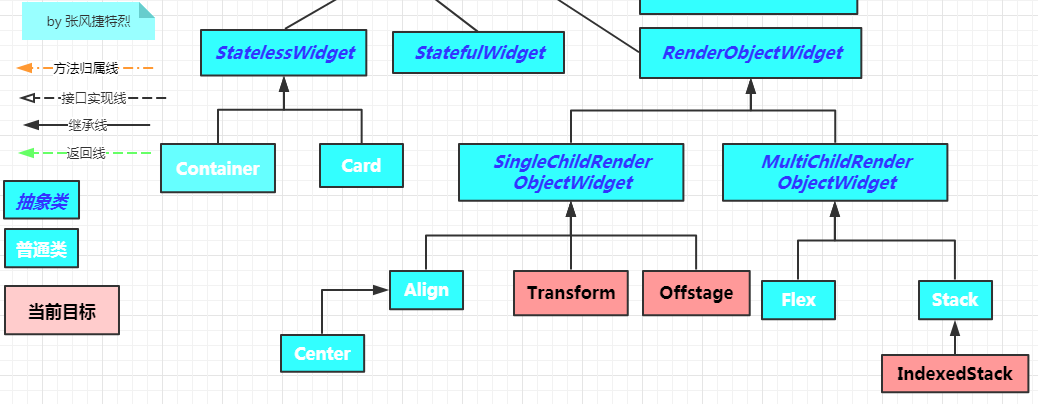
4.IndexedStack--定索引显示

按照索引来显示堆叠容器中的控件,挺好玩的
1
2
3
4
5
6
7
8
9
10
11
12
13
14
15
16
17
18
19
var index_stack_test = Container(
color: Color.fromARGB(100, 81, 211, 253),
height: 150,
width: 250,
child: IndexedStack(
index:3,
alignment: Alignment.centerLeft,
children: <Widget>[
Text('绝域从军计惘然,'),
Align(
alignment: Alignment.topRight,
widthFactor: 1.5,
child: Card(
elevation: 10, color: Color(0xffffffff), child: Text('东南幽恨满词笺。')),
),
Text('一箫一剑平生意,'),
Text('负尽狂名十五年。'),
],
));

5.Transform--变换

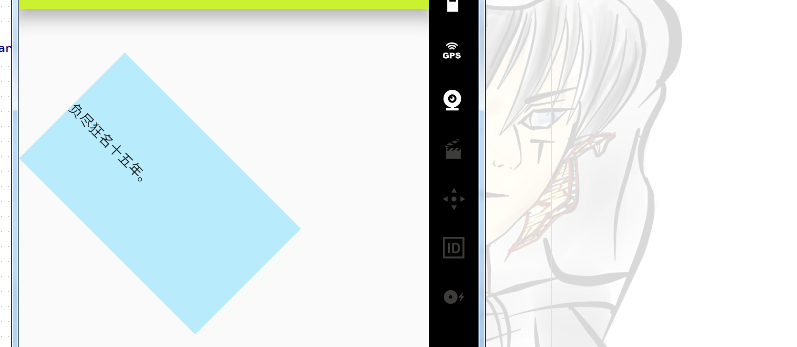
transform属性的Matrix4有机会肯定好好分析分析,mark一下
Matrix4.rotationZ传入的是弧度制的度数,佩服佩服

1
2
3
4
5
Transform(
origin: Offset(0, 150),
transform: Matrix4.rotationZ(3.1415 / 4),
child: //同上面的Container,挺长的,不贴了
)


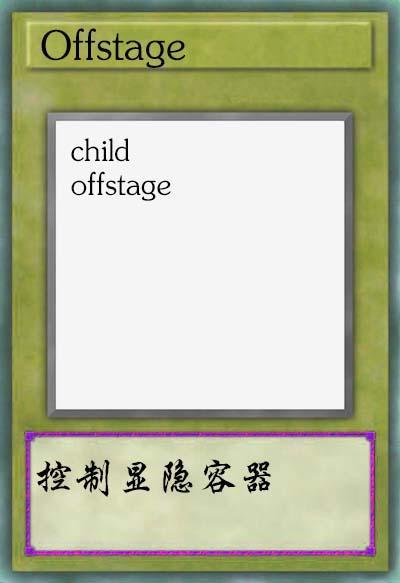
6.Offstage--显隐控制

负尽狂名十五年用Offstage包裹一下,offstage为true–隐藏,为false–显示
感觉应该挺好用,简洁,明了,人狠话不多。

1
2
3
4
Offstage(
offstage: false,
child: Text('负尽狂名十五年。'),
),
恭喜获得成就:布局小新手 :奖励卡牌:
- - -

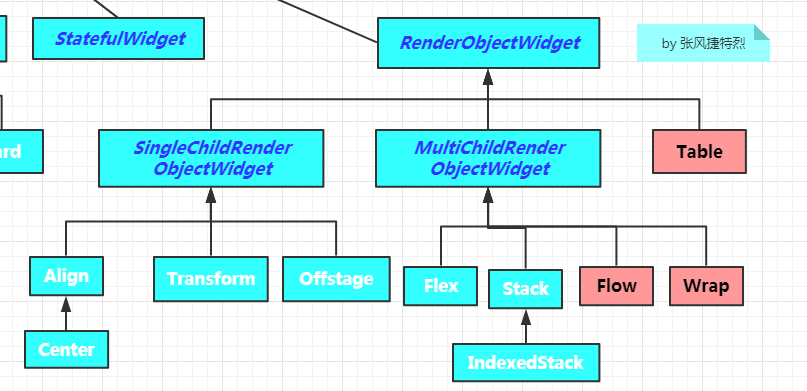
三、基础控件点将台之–三大战力

隐藏剧情触发:
NPC:传说有三条恶龙盘踞在布局深处,为祸人间,勇士们,准备好了吗?
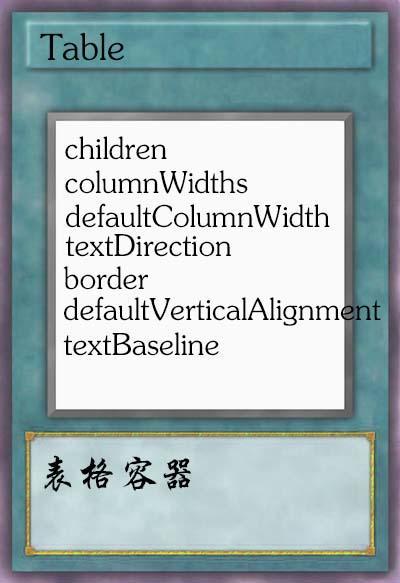
1.表格–Table
1.1:属性一览
1
2
3
4
5
6
7
this.children = const <TableRow>[],
this.columnWidths,
this.defaultColumnWidth = const FlexColumnWidth(1.0),
this.textDirection,
this.border,
this.defaultVerticalAlignment = TableCellVerticalAlignment.top,
this.textBaseline,

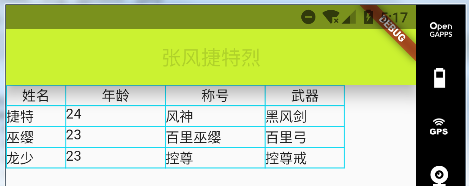
1.2:新手任务4:完成下面表格

代码实现:
columnWidths:可以指定每列的宽度
border:边线的样式
children:通过TableRow来显示一行

1
2
3
4
5
6
7
8
9
10
11
12
13
14
15
16
17
18
19
20
21
22
23
24
25
26
27
28
29
30
31
32
33
34
35
36
37
38
39
40
41
42
43
44
45
var table_test = Table(
columnWidths: const <int, TableColumnWidth>{
0: FixedColumnWidth(60.0),
1: FixedColumnWidth(100.0),
2: FixedColumnWidth(100.0),
3: FixedColumnWidth(80.0),
},
defaultVerticalAlignment: TableCellVerticalAlignment.middle,
border:
TableBorder.all(color: Color(0xff16DAF1), width: 1.0, style: BorderStyle.solid),
children: const <TableRow>[
TableRow(
children: <Widget>[
Center(child: Text('姓名')),
Center(child: Text('年龄')),
Center(child: Text('称号')),
Center(child: Text('武器')),
],
),
TableRow(
children: <Widget>[
Text('捷特'),
Text('24'),
Text('风神'),
Text('黑风剑'),
],
),
TableRow(
children: <Widget>[
Text('巫缨'),
Text('23'),
Text('百里巫缨'),
Text('百里弓'),
],
),
TableRow(
children: <Widget>[
Text('龙少'),
Text('23'),
Text('控尊'),
Text('控尊戒'),
],
),
],
);

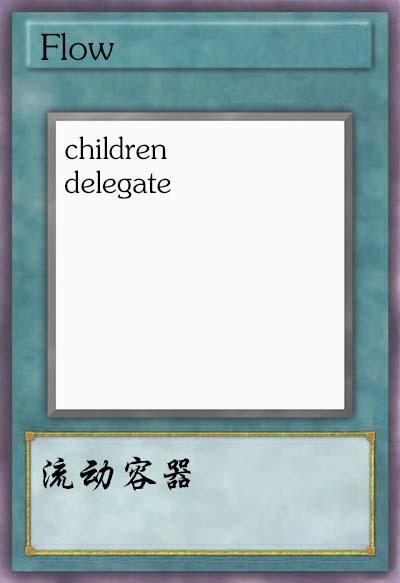
2.流动容器 –Flow:
2.1:属性一览

属性很简洁,但是:FlowDelegate够熬一碗粥的

1
2
FlowDelegate @required this.delegate,
List<Widget> children = const <Widget>[],

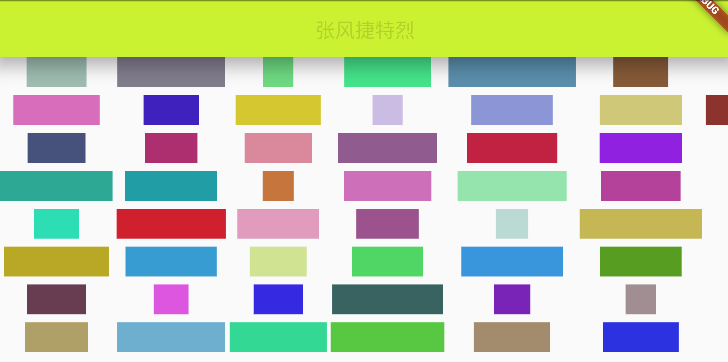
2.2:新手任务5:用完Flow成下面布局

简单分析一下:随机颜色,随机长度,到尾部不够就换行
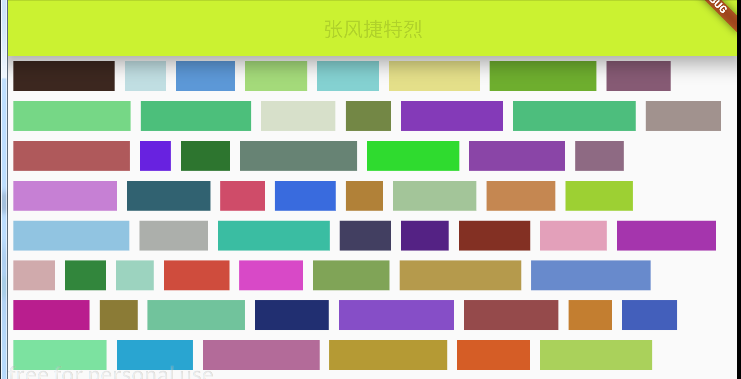
代码实现:从网上找了一个FlowDelegate的实现类
核心就是根据位置可以自己绘制孩子的位置(吐槽:源码了竟然没有实现类,给一个也好啊…)

1
2
3
4
5
6
7
8
9
10
11
12
13
14
15
16
17
18
19
20
class MarginFlowDelegate extends FlowDelegate {
EdgeInsets _margin = EdgeInsets.zero;//成员变量_margin
MarginFlowDelegate(this._margin); //构造函数
@override//绘制孩子的方法
void paintChildren(FlowPaintingContext context) {
var offsetX = _margin.left;
var offsetY = _margin.top;
for (int i = 0; i < context.childCount; i++) {
var w = context.getChildSize(i).width + offsetX + _margin.right;
if (w < context.size.width) {
context.paintChild(i, transform: new Matrix4.translationValues(offsetX, offsetY, 0.0));
offsetX = w + _margin.left;
} else {
offsetX = _margin.left;
offsetY += context.getChildSize(i).height + _margin.top + _margin.bottom;
context.paintChild(i,transform: new Matrix4.translationValues(offsetX, offsetY, 0.0));
offsetX += context.getChildSize(i).width + _margin.left + _margin.right;
}
}
}

动态生成Widget数组(可别傻傻的cv,60个Container)

1
2
3
4
5
6
7
8
9
10
11
12
13
formColorList(int count) {
var random = new Random();
var li = <Widget>[];

for (int i = 0; i < count; i++) {
li.add(new Container(
width: 100 * (random.nextDouble() + 0.3),
height: 30,
color: randomRGB(),
));
}
return li;
}

用起来倒是简单:

1
2
3
var flow_test = Flow(
delegate: MarginFlowDelegate(EdgeInsets.all(5)),
children: formColorList(60));

3.包裹–Warp
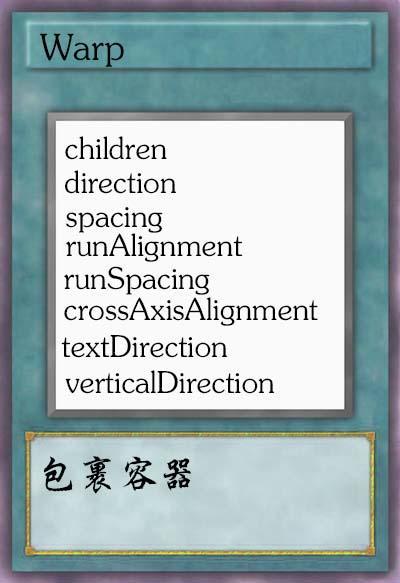
3.1:简单认识:

这东西和css的flex有九分相似,还好我flex布局玩的挺好:有兴趣的可看这里
Flow用起来麻烦很多,但可控制,灵活性更好,如果不是什么逆天改命的布局,Warp应该够了

1
2
3
4
5
6
7
8
9
10
11
12
Wrap({
Key key,
this.direction = Axis.horizontal,
this.alignment = WrapAlignment.start,
this.spacing = 0.0,
this.runAlignment = WrapAlignment.start,
this.runSpacing = 0.0,
this.crossAxisAlignment = WrapCrossAlignment.start,
this.textDirection,
this.verticalDirection = VerticalDirection.down,
List<Widget> children = const <Widget>[],
})
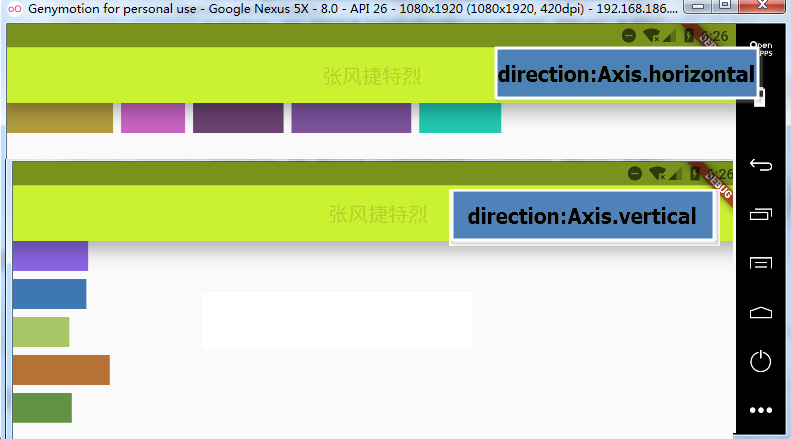
direction


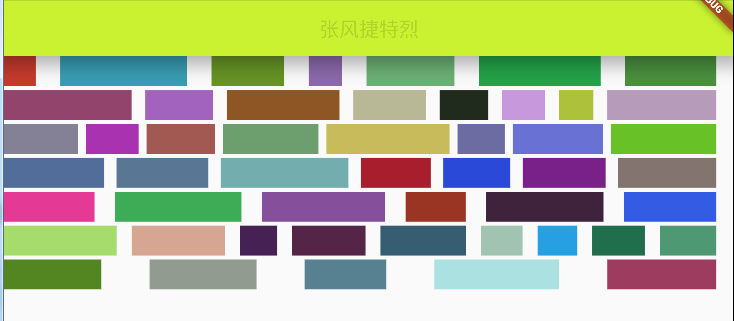
3.2:新手任务6-1

1
2
3
4
5
6
var wrap_test = Wrap(
spacing: 8.0, // 列间距
runSpacing: 4.0, //行间距
direction:Axis.vertical ,
crossAxisAlignment:WrapCrossAlignment.center,
children: formColorList(50));

3.3:新手任务6-2

1
2
3
4
5
6
var wrap_test = Wrap(
spacing: 8.0, // 列间距
runSpacing: 4.0, //行间距
direction:Axis.horizontal ,
alignment:WrapAlignment.spaceBetween,
children: formColorList(50));
duang,三大战力倒下,恭喜获得称号:布局勇士,收获三张传说级卡片:
- - -

三、基础控件点将台之–列表

NPC:好吧,我编不下去了…大家加油!


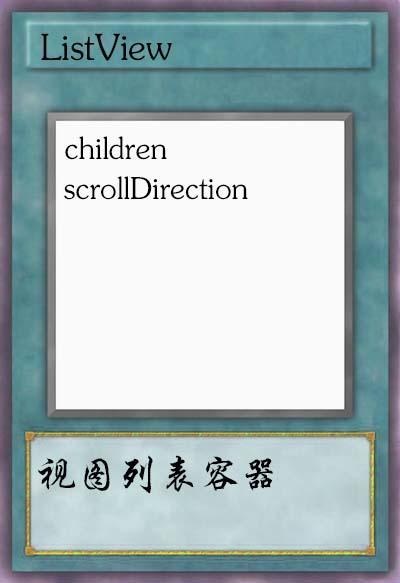
1.老伙伴:ListView

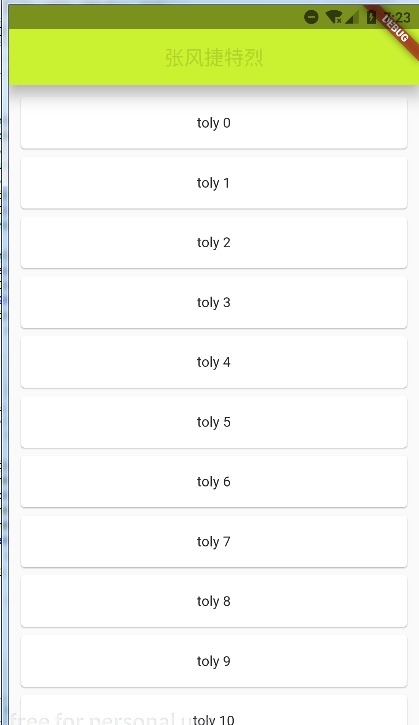
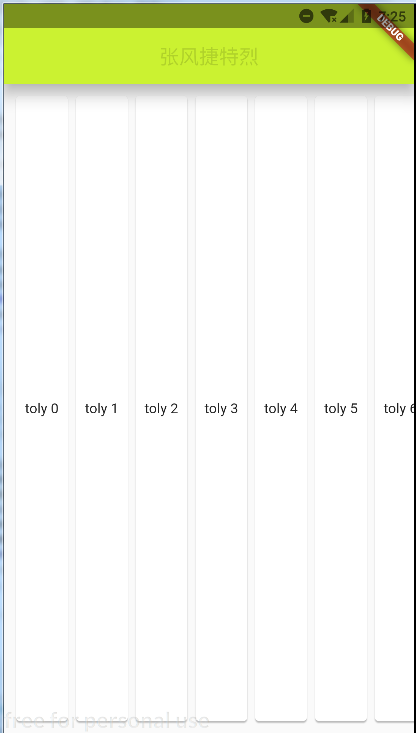
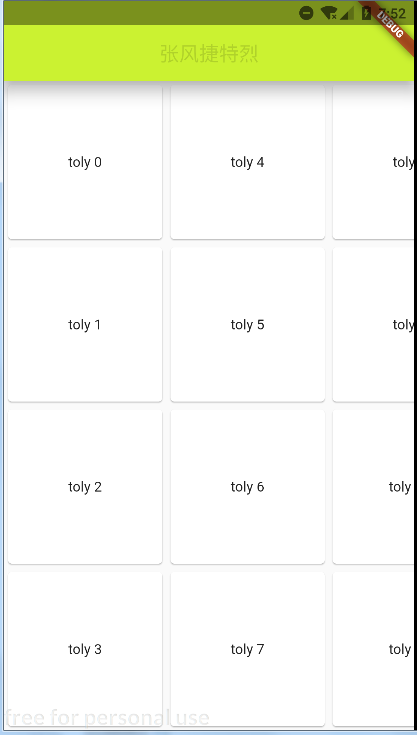
这里先简单看一下效果,明天根据例子来详细分析具体用法
ListView,单独可以用,传入一个Widget数组,批量生产ListView.builder简洁些

1
2
3
4
5
6
7
8
9
10
11
12
13
14
15
16
17
ListView.builder({
Key key,
Axis scrollDirection = Axis.vertical,
bool reverse = false,
ScrollController controller,
bool primary,
ScrollPhysics physics,
bool shrinkWrap = false,
EdgeInsetsGeometry padding,
this.itemExtent,
@required IndexedWidgetBuilder itemBuilder,
int itemCount,
bool addAutomaticKeepAlives = true,
bool addRepaintBoundaries = true,
bool addSemanticIndexes = true,
double cacheExtent,
int semanticChildCount,

竖直 水平
1
2
3
4
5
6
7
8
9
10
11
12
13
14
15
16
17
18
19
20
21
22
23
24
//竖直
var list_view_test = ListView.builder(
itemCount: 20,
padding: EdgeInsets.all(8.0),
itemExtent: 60.0,
itemBuilder: (BuildContext context, int index) {
return Card(
child: Center(child: Text('toly $index')),
);
},
);

//水平
var list_view_test = ListView.builder(
itemCount: 20,
padding: EdgeInsets.all(8.0),
scrollDirection:Axis.horizontal,
itemExtent: 60.0,
itemBuilder: (BuildContext context, int index) {
return Card(
child: Center(child: Text('toly $index')),
);
},
);

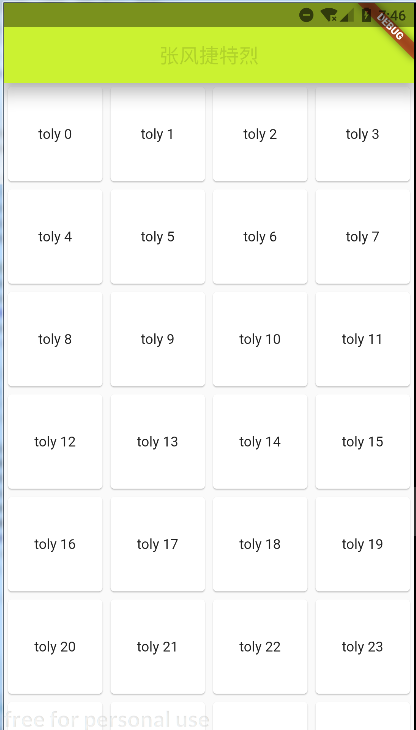
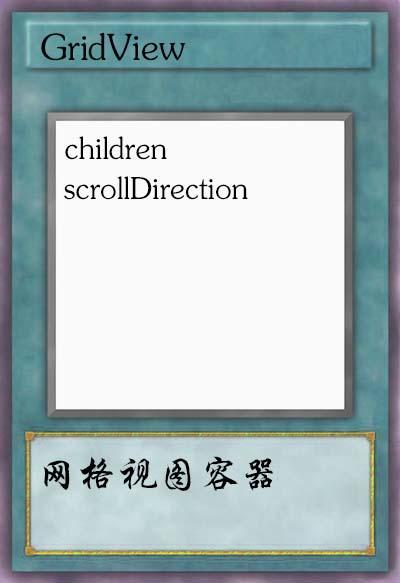
2–老伙伴:GridView
1
2
3
4
5
6
7
8
9
10
11
12
13
14
15
16
17
18
19
GridView.count({
Key key,
Axis scrollDirection = Axis.vertical,
bool reverse = false,
ScrollController controller,
bool primary,
ScrollPhysics physics,
bool shrinkWrap = false,
EdgeInsetsGeometry padding,
@required int crossAxisCount,
double mainAxisSpacing = 0.0,
double crossAxisSpacing = 0.0,
double childAspectRatio = 1.0,
bool addAutomaticKeepAlives = true,
bool addRepaintBoundaries = true,
bool addSemanticIndexes = true,
double cacheExtent,
List<Widget> children = const <Widget>[],
int semanticChildCount,

水平GridView 竖直GridView
1
2
3
4
5
6
7
8
9
10
11
12
13
14
15
16
17
18
19
20
21
22
23
24
25
26
//竖直GridView
var grid_view_test = GridView.count(
crossAxisCount: 4,
children: List.generate(
100,
(index) {
return Card(
child: Center(child: Text('toly $index')),
);
},
),
);

//水平GridView
var grid_view_test = GridView.count(
crossAxisCount: 4,
scrollDirection:Axis.horizontal,
children: List.generate(
100,
(index) {
return Card(
child: Center(child: Text('toly $index')),
);
},
),
);

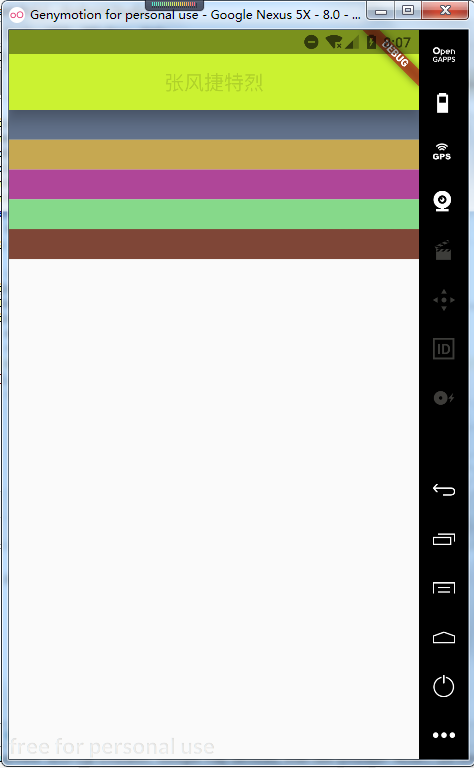
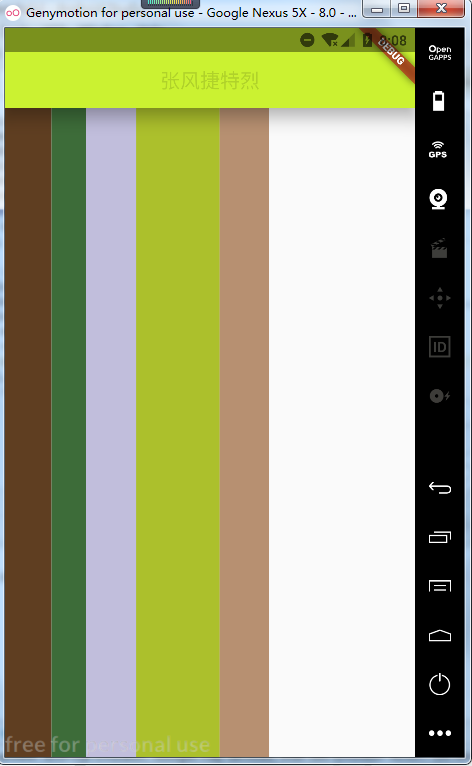
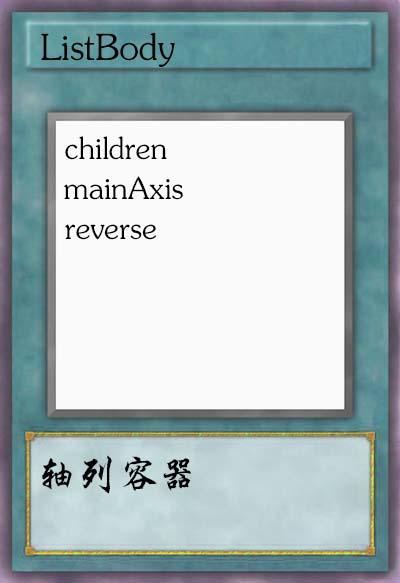
3.轴列容器–ListBody(我自己取的名字)

好吧,被它的名字骗了,和ListView并没有太大的关系,也就是个多孩子的容器
优点在于在指定轴上尺寸正常,另一轴上会被拉伸,见图:

1
2
3
4
5
6
7
8
9
10
A widget that arranges its children sequentially along a given axis,
forcing them to the dimension of the parent in the other axis.
一个widget,它按照给定的轴顺序排列它的子部件,并迫使它们位于另一个轴上的父轴的维度。


ListBody({
Key key,
this.mainAxis = Axis.vertical,
this.reverse = false,
List<Widget> children = const <Widget>[],

水平定 竖直定
1
2
3
4
5
6
7
8
9
10
11
12
13
14
15
16
17
18
19
//竖直定
var list_body_test = Column(
children: <Widget>[
ListBody(
mainAxis: Axis.vertical,
reverse: false,
children: formColorList(5)
)],
);

//水平定
var list_body_test = Row(
children: <Widget>[
ListBody(
mainAxis: Axis.horizontal,
reverse: false,
children: formColorList(5)
)],
);
好了,又到三局一度的发卡时间了

未精炼的传说级卡片,更多属性加成,战士们,去精炼吧

- - -

四、容器扫个尾:

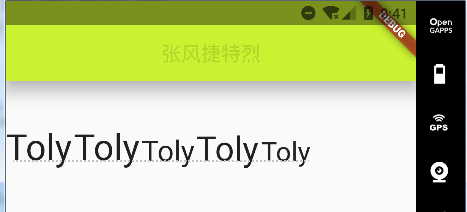
1.Baseline

将文字按照基线对齐(因为比较好看)–baseline越大,距离顶端越远

1
2
3
4
5
const Baseline({
Key key,
@required this.baseline,
@required this.baselineType,
Widget child

1
2
3
4
5
6
7
8
9
10
11
12
13
14
15
16
17
18
19
20
21
22
formTextList(int count) {
var random = new Random();
var li = <Widget>[];

for (int i = 0; i < count; i++) {
li.add(new Baseline(
baselineType: TextBaseline.alphabetic,
child: new Text('Toly',
style: new TextStyle(
fontSize: 20.0 + random.nextInt(40),
textBaseline: TextBaseline.alphabetic,
),
),
baseline: 80,
));
}
return li;
}

var base_line_test = new Row(
children: formTextList(5),
);

2.FractionallySizedBox

这个挺有意思,儿子随爷爷,父亲(FractionallySizedBox)中间倒把手
可以实现爷爷和孙子之间的尺寸比例联系

1
2
3
4
5
6
const FractionallySizedBox({
Key key,
this.alignment = Alignment.center,
this.widthFactor,
this.heightFactor,
Widget child,

1
2
3
4
5
6
7
8
9
10
11
12
13
var fsb_test = new Container(
color: Colors.blue,
height: 150.0,
width: 150.0,
child: new FractionallySizedBox(
alignment: Alignment.bottomCenter,
widthFactor: 1.5,
heightFactor: 0.5,
child: new Container(
color: Colors.red,
),
),
);

3.AspectRatio

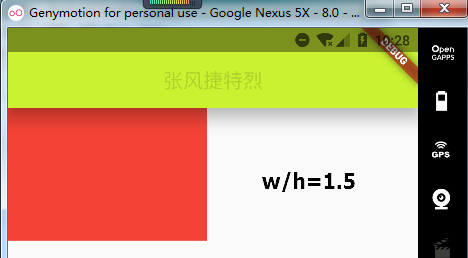
就是设定一个定比例的容器width/height=aspectRatio

1
2
3
4
const AspectRatio({
Key key,
@required this.aspectRatio,
Widget child

1
2
3
4
5
6
7
8
9
var aspectratio_test = new Container(
width: 200.0,
child: new AspectRatio(
aspectRatio: 1.5,
child: new Container(
color: Colors.red,
),
),
);

恭喜获得称号:布局学徒 ,奖励卡片
- - -

还剩几个Box,明天写几个布局例子顺带讲一下,反正每个新控件都会发张卡
最后把卡片总结起来,看看能不能凑够两幅扑克牌…打印出来当扑克牌打,还怕Flutter控件学不会?
好了,今天就到这里,脑细胞死不少,赶快看几集动漫补补脑。


五、总结一下mark的点:

1
2
3
4
5
6
7
8
9
10
11
12
13
//第一天:
3.现在焦点应该汇聚在StatefulWidget身上,很多地方都出现了,mark一下
---StatefulWidget是Widget的一个子类,是具有状态的控件,可谓元老级别

4.canvas竟然没办法画文字,这不科学,mark一下
---保持mark

//第三天:
1.这里mark一下Card里的ShapeBorder shape,源码粗略看了一下,可能挺好玩,今天主看控件
---保持mark

2.transform属性的Matrix4有机会肯定好好分析分析,mark一下
---保持mark
张风捷特烈 wechat
-------------本文结束感谢您的阅读 @张风捷特烈-------------
0%